Build a Low-Cost Organic Grow Box for Your Balcony
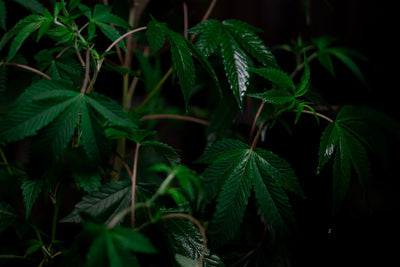
Photo by Canan İldeniz via Pexels.
Most people picture a serious organic grow setup and immediately think of a dedicated grow tent, a commercial LED panel, and a few hundred dollars in filtration gear before they've even bought soil. That assumption keeps a lot of balcony and patio growers from starting at all, or pushes them into overspending on a commercial 2x2 box that runs $400 to $800 for capability you can match yourself for $200 to $400. The difference isn't corner-cutting -- it's that a commercial kit is built to a generic spec sheet, while a box you size yourself is built around the airflow, light, and footprint your specific balcony actually has.
Organic balcony growing is really a sizing problem wrapped in a soil-biology problem. Get the cabinet dimensions, fan CFM, and pot volume matched to the plant you're actually growing, and feed that plant living soil instead of synthetic shortcuts, and a 2x2 footprint will outperform what most people assume is possible in that space. But none of the build advice matters if you skip the legal homework first -- home cultivation law is a patchwork even among states with legal retail sales, and a visible balcony setup raises the stakes if you're in a restrictive state. This guide walks through the legal check, the build itself, ventilation math, organic substrate choices, and the companion-planting tricks that keep a shared balcony or patio low-key.
Check Your Legal Footing Before You Build Anything

Photo by goodrich kingrey via Unsplash.
Check this before you buy a single 2x4 or fabric pot: as of August 2026, 25 states plus Washington D.C. allow some form of home cannabis cultivation. That sounds like a majority, but it leaves roughly half the country where growing at home is either outright illegal or restricted to a narrow category of people. The gap between legal sales and legal home grow trips up a lot of people -- New Jersey, Delaware, and Washington state all have functioning recreational markets where you can walk into a dispensary and buy flower, yet all three ban home cultivation entirely, recreational or medical. Illinois sits in its own middle ground: recreational sales are legal, but only registered medical patients are permitted to grow at home. A recreational buyer in Chicago has zero legal path to a home grow, no matter how discreet the setup.
Balcony and patio builds carry extra exposure that an indoor closet grow doesn't. A cabinet tucked into a spare bedroom is invisible to anyone who doesn't live with you. A grow box on a shared balcony, especially in an apartment building, condo complex, or anywhere with sightlines from neighboring units or a street below, is visible by design -- you're ventilating it, watering it, and probably opening it regularly in a space other people can see into. If you're in a gray-area state or one with low plant-count limits, that visibility matters more than it would indoors.
Before you spend money on materials, confirm three things for your specific state: whether home cultivation is legal at all, what the plant count limit is per adult or per household, and whether there's any specific restriction on cultivation visible from outside the home -- some jurisdictions treat outdoor-visible grows, even on a private balcony, differently than fully enclosed indoor ones. This is a five-minute check against your state's official cannabis regulatory agency page, and it's the cheapest insurance you'll buy on this whole project.
Sizing and Building the Box: What $200-$400 Actually Buys You

Photo by Akshay Chauhan via Unsplash.
A $200 to $400 budget for a 2x2 cabinet sounds tight until you break down what you're actually paying for: an enclosure, interior lining, a light, an inline fan with ducting, and basic hardware. None of these need to be premium-tier to work well, and the single biggest lever on total cost is whether you build the enclosure from scratch or repurpose something that already exists. A framed plywood box with hinges and weatherproofing can easily eat $100 to $150 in lumber and fasteners alone. An old wardrobe, armoire, or deep storage cabinet pulled from a secondhand shop or curb find does the same job structurally for $0 to $50, and most already have doors, shelving you can strip out, and enough rigidity to mount a light and fan without extra bracing.
Whatever shell you start with, line the interior with white panel board or Mylar sheeting -- a few dollars per square foot -- to bounce light back onto the canopy instead of losing it to a dark wood interior. That single step measurably improves light efficiency in a box this size, where every inch of usable light matters more than in a larger tent. A quality LED fixture sized for a 2x2 footprint runs $80 to $150 depending on brand and output; this is not the place to buy the cheapest no-name panel on the market, since light quality directly caps your yield ceiling regardless of how good your soil is.
Round out the build with a 4-inch inline fan, matching ducting, and basic hardware -- hinges, vent screening, cable clips -- and you're typically in the $60 to $100 range for that portion alone. Compare that full build to a commercial 2x2 box at $400 to $800, and the savings come almost entirely from sourcing the enclosure secondhand and buying components individually rather than paying a markup for a pre-assembled kit.
One build detail that matters more on a balcony than indoors: keep the box shallow, front to back, so it sits flush against a railing or wall without eating into your walking space. A cabinet that's 24 inches deep is manageable; one that's 36 inches deep turns a small balcony into an obstacle course, and that's the kind of thing that draws attention from neighbors faster than the grow itself does.
Ventilation Math: Don't Guess on Your Fan Size

Required fan CFM scales directly with cabinet volume for a 1-minute air exchange rate, ranging from 8 CFM for an 8 cu ft space to 24 CFM for a 24 cu ft space, while extending the exchange time to 3 minutes cuts the requirement for a 16 cu ft cabinet to just 5.3 CFM.
Fan sizing is the one spot in this build where guessing actually costs you plants, not just money. The rule of thumb that holds up across small cabinet grows is that your inline fan should exchange the box's entire air volume once every one to three minutes. Do the math for your actual box rather than eyeballing it: a 2x2x4-foot cabinet holds 16 cubic feet of air. To turn that volume over once per minute, you need roughly 16 CFM; building in headroom for ducting length, bends, and a carbon filter's static pressure resistance, you want a fan rated well above the bare minimum -- a standard 4-inch inline fan rated at 190 CFM or more gives you that margin comfortably.
Undersized fans are the most common cause of failed small-space grows, and the symptoms show up fast: heat builds up around the light, humidity climbs because there's nowhere for transpired moisture to go, and mold risk on buds during flowering goes up sharply once relative humidity sits above 55-60% with poor air exchange. But bigger isn't automatically better here -- an oversized fan pulling far more air than the box needs wastes electricity running a bigger motor than necessary, and it can dry out the canopy and topsoil too aggressively, forcing you to water more often and stressing the plant with constant humidity swings. Match CFM to volume, not to whatever fan happens to be on sale.
Pair whatever fan you land on with a carbon filter rated for the same CFM range. This isn't optional on a balcony -- odor control that works fine in a detached garage will get you a complaint from a neighbor three units over once you hit peak flowering smell. A filter undersized relative to your fan either restricts airflow and strains the fan motor, or lets odor through unfiltered once it reaches end-of-life carbon saturation faster than expected.
Last piece: don't rely on the exhaust fan alone to move air through the box. Cut or install passive intake vents on the opposite side of the cabinet from your exhaust fan. Without a dedicated intake, the fan creates negative pressure and pulls air through every seam and gap in the cabinet instead of in a controlled path across the canopy, which undermines your odor control and your temperature management at the same time.
Choosing Pots and Organic Soil for Container Growing
Pot size should follow your expected final plant height, not a one-size-fits-all guess. For a compact plant topping out around 80 cm -- typical of many autoflowers -- a 7 to 10 liter fabric pot gives the root system enough room without wasting soil volume you don't need in a tight cabinet. Plants expected to reach 120 cm do better in 10 to 20 liters, and anything you're pushing past 150 cm, which is more common with photoperiod strains given extended veg time, needs 40 liters or more to support the root mass a plant that size actually develops. Undersizing the pot is the fastest way to stunt a plant that otherwise has the genetics and light to go bigger.
Fabric pots are worth the slightly higher price over plastic in a balcony setup specifically because container growing can't drain excess water into surrounding soil the way an in-ground plant can. The breathable fabric walls let excess moisture evaporate and air reach the root zone from the sides, which air-prunes roots and largely prevents the waterlogged, oxygen-starved root zone that kills container plants grown in solid plastic pots sitting on a balcony with no real drainage path.
For the soil itself, you've got two solid routes. A lot of growers skip the formulation work entirely and buy soil pre-fertilized specifically for cannabis -- these mixes are built with the nutrient curve and aeration cannabis needs already dialed in, and they're a smart choice if this is your first organic build. If you'd rather mix your own, a blend of coco coir, perlite, and a quality base soil holds both water and oxygen well in a container, which is the exact balance a pot needs since it doesn't have the buffering capacity of open ground.
What you should skip entirely is regular garden-center potting soil. It's formulated for general ornamentals and vegetables, not a nutrient-hungry plant like cannabis, and it typically lacks both the nutrient load and the aeration structure this crop needs -- using it caps your yield potential before you've even started. Once your soil base is set, build real biology into it by mixing in compost or worm humus at planting, and top-dressing again during veg. This is where organic growing actually pays off over synthetic feeding, since a living soil microbiome keeps feeding the plant steadily rather than in the spikes and crashes you get from bottled nutrients alone.
Staying Discreet: Companion Plants and Odor Management

Photo by Ariane Frei via Unsplash.
The best disguise for a cannabis plant on a shared balcony is making the whole space look like an ordinary container garden. Surround your grow box with the kind of plants everyone already expects to see on a balcony -- tomatoes, sunflowers, peppers. A cluster of containers with mixed foliage reads as a hobby gardener's setup at a glance, and most passersby and neighbors genuinely won't give it a second look if the grow box itself isn't visually calling attention to itself.
Aromatic herbs do double duty here. Basil, mint, and rosemary planted in pots near the grow box put a competing scent into the air that helps mask cannabis smell, particularly useful once plants move into bloom and start producing the terpene-heavy smell that gives most setups away. It's not a complete solution on its own, but combined with good filtration it meaningfully reduces how far and how strong the smell carries to the units or yard next door.
Be realistic about what masking plants can and can't do. Odor during flowering, especially in the final 3-4 weeks when resin production peaks, is going to escape the box to some degree no matter how well you've filtered and masked it -- a fully sealed, zero-odor balcony grow isn't a realistic goal with a passive-intake cabinet setup. That means your strain choice matters as much as your fan and filter sizing. If you're growing somewhere that a strong smell could draw complaints, a lower-odor genetic like Auto Northern Lights is a genuinely practical pick -- it finishes with a noticeably milder smell profile than the loud, pungent strains that dominate dispensary menus, and it pairs well with the compact, fast-finishing profile that suits a small cabinet anyway.
This is also where seed quality earns its keep. Stable, well-bred genetics from a reputable seed bank like Seedtiva make the whole project more predictable -- you're working with limited, fixed balcony space, and knowing roughly how tall a plant will get and how strong its smell will run before you commit eight to twelve weeks of a container slot to it is worth far more than chasing a strain based on bag appeal alone.
Putting It Together: A Realistic Balcony Grow Timeline
For a first organic balcony build, autoflowers are the pragmatic choice. They stay compact, which matches the pot sizing and cabinet dimensions you've already built, and they finish in roughly 10 to 12 weeks from seed without needing a light schedule change partway through -- useful when your light is on a simple timer in a shared balcony setup where you're not babysitting a 12/12 flip. Photoperiod strains can absolutely work in the same box, but they add a layer of light-schedule management that's one more thing to get wrong in a small space.
Expect to transplant once, possibly twice, as the plant outgrows its starter container before it goes into its final pot. Starting seedlings in a small 1 to 2 liter container and then stepping up to an intermediate size before the final 10 to 40 liter pot (sized to the height targets from earlier) reduces transplant shock better than jumping straight to the biggest pot on day one, where unused soil volume can stay waterlogged and sour around roots that haven't filled it yet.
Watch the box itself for early warning signs that your ventilation math was off. Cupping leaves that curl downward at the edges, condensation fogging on the interior walls, and soil that stays damp far longer than expected between waterings are all signs airflow is undersized for the volume you built, even if your CFM number looked right on paper -- ducting length, bends, and filter resistance all eat into real-world airflow versus the fan's rated spec.
Keep expectations grounded going into your first season. Real yield and final plant size vary a lot based on genetics, your specific climate, and how consistent you are with watering and light exposure day to day -- a balcony box gives you control over the variables you can manage, not a guaranteed output number. Think of the first build as a baseline. Once you've run a cycle or two and know how your specific balcony's sun exposure, temperature swings, and airflow actually behave through a full season, you'll have real data to size a second plant, a bigger pot, or a taller strain against next time, instead of guessing again from scratch.
The $200 to $400 you put into a well-planned box buys more real control than most commercial kits twice that price, because every piece of it -- fan CFM, pot liters, cabinet depth -- was sized to the plant you're actually growing instead of a generic spec sheet aimed at the widest possible customer base. That's the whole advantage of building it yourself: nothing in the box is oversized or undersized for guesswork's sake.
Organic growing specifically rewards the grower who's willing to wait on soil biology rather than chase a quick fix. Compost and worm humus don't transform a container's performance overnight -- it typically takes a full season of top-dressing and microbial buildup before you see the steadier feeding curve and healthier root development that living soil is actually known for. Don't judge the method off one fast cycle.
Start your first season small, legal-compliant, and realistic about what one 2x2 box can do. Once you've watched a full cycle play out on your specific balcony -- how the sun actually tracks across it, how your airflow holds up in real heat, how a given strain's smell and height actually turned out -- you'll have the information to scale the box, step up pot sizes, or pick a bigger strain next time, rather than guessing twice.
Sources
- Cannabis Cultivation Balcony - How to grow on the balcony - Bonsanto®
- Best Grow Boxes for Cannabis: Top All-in-One Kits for Home Cultivation
- Best Grow Box for Weed: Top Grow Tents and Raised Beds for Home Indoor Growing
- Best Cannabis Grow Kits for Indoor Growing (2026)
- 35 Gallon Outdoor Weed Grow Kit: Grow Huge Plants with Ease - a Pot for Pot