Germinating Seeds in a Grow Box: A Step-by-Step Setup
Photo via Unsplash.
The seed you're staring at right now has exactly one job in the next five days, and it's a job that fails constantly in home setups for one boring reason: nobody built an environment that actually holds still. A windowsill gets cold overnight. A closet gets no airflow and the surface dries out while the center stays soggy. A paper towel on top of the fridge cooks one side and leaves the other cold. None of these are dramatic failures -- they're just small inconsistencies that add up to a seed sitting in limbo, or worse, turning to mush before it ever cracks.
A grow box fixes this by giving you control over two variables at once -- temperature and humidity -- instead of fighting one while ignoring the other. This isn't about buying expensive gear for its own sake. It's about setting up something boring and repeatable so the biology can just do what it's going to do. Below is the actual setup: how to pick a germination method before you buy anything, what equipment matters and what doesn't, the exact temperature and humidity numbers to hit, and how to fix it when day 7 arrives and nothing's popped yet.
Why a Grow Box Beats Winging It
Germination asks for two things simultaneously that most home environments can't deliver together: soil temperature in the 18-25°C range (with cannabis specifically preferring the warmer end, 75-80°F or 24-27°C) and humidity sitting close to 100% right at the seed. A windowsill can occasionally give you one of these on a sunny afternoon. It almost never gives you both, and it definitely doesn't give you both at 3am when the room temperature drops eight degrees and the seed just sat in cold, still-damp medium for six hours.
This is exactly what a dedicated box solves -- a heat source underneath, a humidity dome on top, and an enclosed space that doesn't care what the rest of the room is doing. Note the word during up there, because this is where a lot of people undo their own good work: those high-humidity, high-heat targets apply only to the germination window itself. The second a taproot cracks the shell or a sprout pushes through the medium, both numbers need to start coming back down. Leave a seedling sitting in a 100%-humidity dome at 80°F and you're no longer germinating a seed, you're incubating damping-off fungus, which kills more young seedlings than any pest or deficiency ever will.
What actually separates a good setup from a mediocre one isn't precision, it's consistency. A box that holds a steady 78°F around the clock will outperform a setup that spikes to 85°F under a lamp at noon and drops to 65°F overnight, even though the average temperature across both might look identical on paper. Seeds respond to steady conditions, not averages -- the cell enzymes driving germination work within a narrow, stable window, and every swing outside it resets the clock a little.
One more variable worth factoring in before you even start: seed age and storage history. Seeds kept in normal home conditions -- a drawer, a cupboard, not perfectly sealed -- tend to stay reliably viable for 2-3 years. Stored cool, dark, and airtight (a sealed container in the fridge, ideally with a little desiccant), viability can stretch past 5 years. If you're working with seeds of unknown age or that have been sitting loose in a drawer for a while, build in some patience and lean toward a gentler method -- older seeds often have a tougher, drier shell and benefit from a longer runway before you judge them a failure.
Choosing Your Germination Method Before You Build the Box
Before you assemble a single piece of equipment, decide how you're actually going to sprout the seed, because this choice shapes what the box needs to do. There are four methods worth knowing, and they're not interchangeable -- each one trades speed, success rate, and risk differently.
The paper towel method is the default for a reason: damp paper towels between two plates or in a sealed container, checked twice daily, typically shows a taproot in 24-120 hours with a 90-95% success rate in the hands of someone paying attention. It's cheap, fast, and lets you visually confirm germination before committing a seed to medium. Its one real weakness is the transplant moment -- that taproot is brittle and snapping it while moving the seed into a cube or soil is the single most common way people sabotage an otherwise successful germination.
A glass-of-water pre-soak is a 12-24 hour head start, not a full method on its own -- after the soak you still move to paper towel. It's best reserved for older seeds or ones with a noticeably thick, hard shell, since the extended water contact softens the shell faster than paper towel alone. Expect 80-90% success; it's slightly lower than straight paper towel because a seed left soaking too long can drown rather than soften.
Direct-in-starter-container skips the handling risk entirely -- you plant the seed straight into its final starting medium and wait, usually 48-168 hours, with a 70-85% success rate. It's slower and you're flying blind until a sprout appears, but there's zero taproot-snapping risk because there's no transfer at all.
Starter cubes -- rockwool, Rapid Rooters, Jiffy pellets -- land in the middle at 48-120 hours and 80-90% success, and they're the right call if you're running hydro or starting more than a handful of seeds at once. The step people skip is pre-soaking cubes in pH 5.5 water for at least an hour before inserting the seed; skip that and you'll often get a stalled, confused seed sitting in a cube with the wrong pH right at its root zone. Between the cube options, Rapid Rooters generally outperform Jiffy peat pellets, since Jiffy's mesh netting makes young roots work harder than they should, while Rapid Rooters aerate better and let roots move freely.
Building the Box: Equipment and Layout
Once you've picked a method, the box itself only needs to solve four problems: hold heat, hold humidity, let you see both, and give the seed somewhere to sit. That's a cell tray, a humidity dome, a heat mat, and a thermometer that reads root-zone temperature, not ambient air temperature -- a cheap probe thermometer pushed into the medium next to (not touching) the seed tells you far more than a thermostat on the wall ever will.
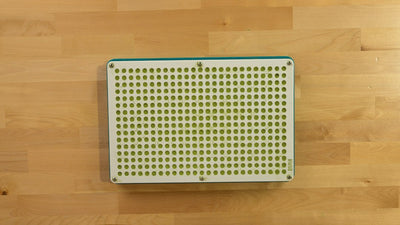
On the packaged end, something like the AC Infinity Germination Kit Pro (around $50) bundles a 6x12 cell tray, a dome, a thermostat-controlled heat mat, and a digital temperature readout, and in practice holds root-zone temp within about 1 degree of your set point. For anyone who's tired of guessing, that consistency alone is worth the price -- it removes the single biggest variable in the whole process.
If you're starting a lot of seeds and don't need the bells and whistles, Rapid Rooter trays running about $22 for 50 plugs are hard to beat on cost per seed. You'll still want your own heat source and a way to check temperature, but the medium itself is reliable and forgiving.
At the top end, newer all-in-one AI grow boxes -- AC Infinity's AI edition, Spider Farmer's SmartTent -- now ship with a dedicated germination mode that auto-sets 28°C and 90% RH without you touching a dial, priced roughly €1,099-1,699 for a 4x4 unit. That's a reasonable buy if you're already planning to use the tent for the full grow afterward; it's overkill if germinating seeds is the only job you need done.
Whatever box you build, the physical planting details matter more than the price tag. Seed goes pointy-side down, about 0.25 inches (6mm) deep -- any shallower and it dries out, any deeper and the sprout burns energy it needs for its first leaves just reaching the surface. Keep the medium moist, never waterlogged; a seed sitting in standing water suffocates and rots before it ever gets the chance to crack. And even though you're chasing near-100% humidity under that dome, crack it open for a few minutes once or twice a day. Stagnant, saturated air without any exchange is exactly the environment mold and damping-off organisms want.
Dialing In Temperature, Humidity, and Light

The Paper Towel method tends to have the highest germination success rate, outperforming Glass of Water and Starter Cubes, with Direct in Container generally coming in lowest.
The number to hold onto for the entire germination window is 75-80°F (24-27°C) at the root zone, with humidity under the dome sitting as close to 100% as you can manage. Under those conditions, most viable, well-stored cannabis seeds will show a cracked shell or emerged sprout somewhere in the 2-5 day range. That window is your diagnostic tool as much as your target -- if you're sitting at day 7 or beyond with nothing to show for it, the setup has a problem worth tracking down, not a seed that just needs more time.
Light matters earlier than most new growers assume, and spectrum matters more than intensity at this stage. Red-dominant LED spectra have been shown to speed up germination rate and produce more uniform, vigorous seedlings than blue-heavy spectra, which push more toward compact vegetative growth than early sprout development. If your grow light has adjustable spectrum, dial toward red for this phase; if it's fixed, a general full-spectrum LED with decent red output will still outperform a cool-white or blue-shifted bulb.
Positioning is simple but easy to get wrong in both directions: keep the light 2-6 inches above the tray. Too far and the seedling stretches toward it, going thin and leggy as it tries to find enough intensity. Too close and you risk heat stress right at the point where the plant is most fragile. As the seedling grows, raise the light gradually to stay ahead of it -- you're chasing a moving target, not setting it once and walking away.
The transition moment is the one most people miss entirely: the second that taproot cracks the shell, or the sprout breaks through the medium surface, the clock starts on backing off both heat and humidity. Don't yank the dome off and crank a fan on it immediately -- step it down over the following several days, cracking the dome more each day and letting the heat mat's thermostat drift a few degrees lower, until the seedling is sitting in normal room conditions. This gradual hardening-off is what prevents the stretch, shock, and damping-off that hits so many seedlings in their first week above the surface.
Troubleshooting Common Grow Box Problems

Photo via Unsplash.
Most grow box problems trace back to one of a handful of root causes, and almost all of them are diagnosable without guessing. No sprout after 7+ days is the most common complaint, and the first move isn't to assume the seed is dead -- it's to push an actual probe thermometer into the medium at seed depth. Ambient air readings from a wall thermostat or even a dome-mounted gauge can be several degrees off from what's happening right where the seed sits, and that gap is often the entire explanation.
A mushy, discolored, or foul-smelling seed is almost always an oxygen problem dressed up as a moisture problem. Overwatering saturates the medium and pushes out air pockets the seed needs; a dome that's never vented compounds it by trapping stagnant, oxygen-poor air right at the surface. The fix is the same one from the setup stage -- moist, not wet, and crack that dome daily even when you're chasing high humidity.
If the shell has cracked but the taproot or sprout has stalled there, check moisture directly at seed depth rather than trusting what the dome looks like. It's common for the surface layer of medium to dry out while the dome still reads humid, especially under a heat mat that's pulling moisture upward and out faster than it seems. A seed that's cracked and ready needs continuous moisture contact to keep moving -- a dry pocket right at that depth will stop it cold even in a humid box.
Leggy, pale seedlings right after emergence point to light problems almost every time: the light sitting too far away, a spectrum that's too blue-heavy for this early stage, or a humidity dome left on too long after the sprout already broke the surface, trapping heat and softening the stem. Tighten the light distance, shift toward a redder spectrum if you can, and start the hardening-off process the moment you see the sprout, not a day or two later.
Last point, and it's worth repeating because it changes your method choice upfront: if you're working with seeds older than 2-3 years, or seeds with no known storage history, lean toward the glass-of-water pre-soak before committing to paper towel or cubes. That extra 12-24 hours of softening gives a tougher, drier shell a real chance instead of forcing it to crack cold.
The first time through, you'll probably overthink the dome venting, check the thermometer too often, and second-guess a seed that just needs another day. That's normal, and it's also the last time it'll feel that uncertain. Once you've watched one batch actually move through the 2-5 day window in your own space -- seen what your specific box does to temperature overnight, how fast your medium dries at the surface, how your light affects stretch -- you're no longer following someone else's numbers. You're working from your own data.
That's really the whole point of building a dedicated setup instead of winging it on a windowsill: it turns germination from a gamble into a process you can repeat on command. Outcomes still depend on your climate, your specific equipment, and the genetics you're starting with -- a fresh, well-bred seed from a reputable source like Seedtiva's lineup is always going to germinate more predictably than an unknown seed of uncertain age, no matter how good the box is. But the box is the part you control completely, and once it's dialed in, every batch after the first gets quieter, faster, and a lot less stressful to watch.