Grow Tent Running Hot? Fix Your Airflow This Summer
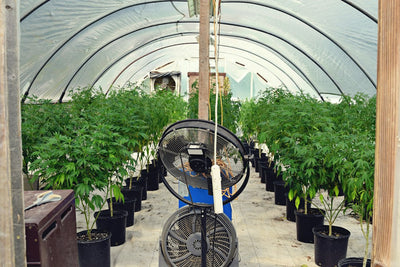
Photo by Min An via Pexels.
Summer 2026 has been brutal in a lot of grow rooms. Regions that rarely see triple digits have been sitting at 90-105°F for stretches at a time, and that heat doesn't stop at the garage door or the spare bedroom wall. It gets into the tent. Growers who had their environment dialed in through spring are suddenly watching canopy temps creep past 85°F, and that's the point where photosynthesis starts throttling back and bud density takes the hit. It's not subtle -- colas that were stacking tight in June start going airy and stretchy by late July, and the grower usually blames the strain before they blame the thermometer.
It's not just the raw degrees, either. When outdoor temps swing hard between day and night, tents that were humidity-stable start bouncing around too, because the relationship between temperature and relative humidity is a moving target, not a fixed one. A tent that reads 55% RH at 78°F can read 40% at 88°F with the exact same amount of water in the air. That instability stresses plants in ways that compound the heat problem -- you're not just fighting temperature anymore, you're fighting a humidity curve that won't sit still.
The instinct almost every grower has at this point is to go buy a portable AC unit. Understandable, but usually the wrong first move and definitely the wrong first dollar. Temperature control in a tent is a three-step problem -- airflow, then lighting, then active cooling -- and the overwhelming majority of hot-tent complaints get solved in the first step alone. This piece walks through how to actually diagnose why your tent is running hot and how to fix the airflow before you spend money on cooling hardware you may not need.
Why Airflow, Not AC, Is Usually the Real Problem

Photo by Pexels via Pixabay.
There are only three levers you can pull to control tent temperature: how much air you're moving, how much heat your lights are generating, and how much active cooling you're applying to bring air temp down artificially. Most growers who think they have a heat problem actually have an airflow problem, and once that's fixed correctly, they never touch lever three at all. The mistake is jumping straight to AC because it feels like the most direct solution -- more cold air in, problem solved. In practice it's expensive, it adds another point of mechanical failure, and it papers over an airflow mistake that will keep causing other problems even after you cool the air down.
Here's the physics piece that trips people up: hot air rises. It doesn't distribute itself evenly through a sealed tent, it stratifies, and it pools right at canopy height -- exactly where your plant is trying to photosynthesize and where your buds are trying to develop density. If your exhaust port is pulling from the middle of the tent, or worse, from down near the floor, you are fighting that physics instead of using it. The exhaust needs to be at the top of the tent, full stop, because that's where the heat actually collects and that's the air you need to be pulling out first.
As a baseline, your exhaust setup should be capable of fully replacing the tent's entire air volume once every minute. Some growers with lower humidity loads can get away with a full exchange every two to three minutes, but once per minute is the number to design around, especially in summer when you're also managing a heavier humidity swing from ambient heat. This isn't a nice-to-have -- it's the number that determines whether your canopy sits at 78°F or 92°F with the exact same lights running.
Before you touch a single fan, though, check the room the tent lives in. If the space around your tent is already sitting at 85°F, pulling that air in through your intake accomplishes nothing -- you're just recirculating heat that was never going to cool your canopy in the first place. This is the diagnostic step that has to happen first: measure your room temp, measure your tent temp, and if they're close together, no amount of fan swapping inside the tent is going to fix the underlying problem. You either need to cool or ventilate the room itself, or you need to duct your intake from a cooler source entirely.
Sizing Your Exhaust Fan Correctly

A 4x4 grow tent requires roughly double the exhaust fan capacity of a 3x3 tent—about 402 CFM versus 205 CFM—highlighting how fan size needs scale with tent volume to properly manage humidity.
Sizing an exhaust fan isn't guesswork, it's arithmetic. Multiply the length, width, and height of your tent in feet to get total cubic feet, then match that number against the CFM rating on the fan's spec sheet. A standard 4x4x7 tent works out to 112 cubic feet. If your target is a full air exchange every minute, you need a fan rated at roughly 112 CFM minimum just to hit that baseline -- and that's before accounting for anything slowing the airflow down.
That last part matters more than people think. Add roughly 20-25% extra CFM capacity on top of your raw calculation to account for the resistance created by a carbon filter, plus whatever ducting bends and length you're running between the fan and the outside vent. Skip this margin and you'll buy a fan that looks correctly sized on paper but underperforms badly once it's actually hooked up to a scrubber and fifteen feet of flexible ducting with two 90-degree turns in it.
In practice, here's what that looks like for common tent sizes. A 3x3 tent, at around 63-75 cubic feet depending on height, is well served by a fan in the 205 CFM range once you build in that filter and ducting margin. A 4x4 tent, running somewhere around 112-140 cubic feet, wants a 6-inch fan rated closer to 400 CFM -- the popular 402 CFM class of inline fans exists specifically because it's the sweet spot for that tent size with a carbon filter attached. If you're running a 5x5 or larger, do the math yourself rather than assuming the next size up on a fan's product line will cover it; larger tents have disproportionately more volume to move per minute, not just a little more.
An undersized exhaust fan is, in my experience, the single most common reason a tent runs hot even when the grower has already turned lights down or switched to a cooler fixture. They've addressed lever two and still have a problem, and it's because lever one was never sized correctly in the first place. It's a cheap fix relative to the alternative -- a 6-inch fan upgrade costs a fraction of what a portable AC unit runs, and it solves the problem at the source instead of trying to out-cool it after the fact.
Fixing Intake: The Half of the Equation Growers Skip

Photo by stux via Pixabay.
Growers spend a lot of energy picking the right exhaust fan and then almost none thinking about where air is actually coming into the tent, and that's the half of the equation that quietly wrecks a lot of otherwise well-planned setups. Intake vents belong at the lowest ports on the tent, not the middle, not wherever happens to be convenient to reach. Cool air needs to enter low, get pulled up past the canopy by the rising heat and the exhaust's pull, and exit at the top. That vertical path is the whole point -- it's what actually clears the hot layer sitting on your plants instead of just adding cold air to the bottom of the tent while the top stays hot.
For tents up to about 4x4, a passive intake -- just an open, mesh-covered port with no fan attached -- is usually enough, because a properly sized exhaust fan creates enough negative pressure to pull air through it on its own. Once you're running 5x5 tents or larger, or if you've got any real distance or restriction on the intake side, an active intake fan starts paying for itself in more even, more reliable airflow.
Here's the failure mode I see constantly: a grower buys a powerful exhaust fan, feels good about their CFM math, and then leaves the intake as a single small port or a half-closed flap. A strong exhaust paired with a restricted intake creates negative pressure that the tent can't equalize, and you'll actually see the tent fabric bow inward, sometimes dramatically. The fan is straining against a vacuum it created itself, CFM output drops well below the spec sheet number, and airflow through the canopy gets choked exactly when you need it most.
The fix is straightforward once you know to look for it: open additional intake ports, switch to wider-diameter intake ducting if you're running any, or add a modest low-CFM active intake fan to balance the pressure the exhaust is creating. And double-check your exhaust placement while you're at it -- exhaust mounted low is a mistake I still see on tents that are otherwise dialed in, because it pulls the already-cooled air sitting near the floor and leaves the actual heat layer parked on top of your canopy, untouched.
Positioning Fans for Real Circulation, Not Just Exchange

Photo by Declan Sun via Unsplash.
Getting the exhaust and intake right handles air exchange -- swapping tent air for outside air on a schedule. It does not handle circulation, which is a separate job and just as important. Your inline duct fan should sit near the top of the tent, pulling warm air out, while your low intake vents feed cooler air in below. That's the exchange system. But exchange alone doesn't move air evenly across a dense canopy -- it creates a general current through the tent while leaving pockets between colas and lower branches essentially untouched.
That's where internal circulation fans come in, and they're not optional in a serious summer setup. Add oscillating fans inside the tent itself, positioned to keep air physically moving across every part of the plant, not just through the tent as a whole. The configuration that works best in my experience is one circulation fan low, blowing across the lower canopy and stalks, and a second one positioned above, moving air across the tops of the colas. Together they create continuous vertical movement that prevents the stagnant hot pockets that a single exhaust fan will always leave behind, no matter how well it's sized.
Good internal circulation does more than manage temperature, too. Constant gentle movement strengthens stems the same way wind does outdoors, so you get sturdier branches that hold up better under the weight of dense buds later in flower. It also discourages mold and powdery mildew by not letting moisture sit still on leaf surfaces, which matters even more in a summer with unstable humidity swings. And it keeps CO2 refreshed right at the leaf surface, where the plant is actually using it -- still air depletes the CO2 boundary layer around each leaf faster than most growers realize.
The target range to design all of this around is 65-85°F, with 70-85°F as the sweet spot for most strains through veg and flower. Sustained temps above 85°F are where things start to go sideways -- photosynthesis efficiency drops and bud density suffers, which is exactly the symptom growers are seeing right now during these summer heat waves and mistakenly attributing to genetics or nutrients instead of airflow.
Cutting Heat at the Source: Lights and Extreme-Heat Options

Photo by maks_d via Unsplash.
Once airflow is genuinely dialed in -- correctly sized exhaust, balanced intake, proper internal circulation -- the next lever to check is the lights themselves, because your fixture might be generating far more heat than it needs to. Traditional HPS and MH lights dump a large share of their input energy straight out as heat rather than usable light; it's simply how the technology works. LEDs, by contrast, can convert up to 90% of input energy into usable light output, which means dramatically less heat load in the tent per watt of light the plant actually receives. For a grower still running HPS, switching to LED is often the single biggest heat reduction available short of installing AC, and it usually comes with a lower electric bill as a side benefit.
There's a second, smaller heat source that gets overlooked: ballasts for HPS/MH fixtures and drivers for LED fixtures both generate their own heat, and if they're sitting inside the tent's sealed perimeter, that heat has nowhere to go but into your air exchange calculations. Relocating ballasts and drivers outside the tent -- even just mounting them on the exterior frame with cabling run through a port -- removes a real heat source from a space that's already working hard to stay cool.
During an actual heat wave, one of the most practical workarounds is shifting to a night-cycle lighting schedule, running your light cycle overnight when ambient room and outdoor temps have dropped, rather than through the hottest part of the afternoon. It doesn't fix the underlying airflow math, but it buys real margin on the days when outdoor temps are pushing past 100°F and your ambient room temp simply won't cooperate no matter what you do inside the tent.
Portable AC, ducted directly into the tent, is the last resort -- not the first purchase -- and it should only enter the picture once exhaust sizing, intake balance, circulation, and lighting heat have all genuinely been addressed. When you do add it, exhaust the hot air outside the grow room entirely, not just out of the tent and into the room, or you'll be right back to the problem from section one: recirculating heat that was never actually removed from the space.
Most tents running hot through these summer 2026 heat waves aren't undercooled -- they're under-ventilated, and those are two very different problems with two very different price tags to fix. Before you spend money on a portable AC unit, work through the airflow math: is your exhaust actually sized for a full air exchange every minute once you account for filter and duct restriction, is your intake balanced enough that the tent isn't pulling inward under negative pressure, and are you moving air across the canopy with internal circulation fans instead of just exchanging it in and out. Fix those three things and check your lighting heat load, and a large share of hot-tent complaints resolve without a single cooling unit being purchased.
Genetics play a role here too, though they're not a substitute for good engineering. Well-bred, resilient seed lines -- particularly tropical and sativa dominant strains tend to tolerate a stressful heat spike with less visible damage than a fragile or poorly stabilized line would, giving you a bit more margin when a summer afternoon gets away from you. But strong genetics buy you forgiveness, not immunity. A plant with excellent heat tolerance still won't stack dense colas at 92°F if the air around it never moves.
Every number in this article -- CFM targets, intake sizing, the 70-85°F sweet spot -- is a starting point, not a guarantee. Your actual results depend on your room, your climate, your tent's specific dimensions, and the equipment you're running, so revisit the CFM math any time you upsize a tent, add a second light, or move the whole setup into a warmer room. It's a five-minute recalculation that saves you from buying cooling hardware to solve a problem that a properly sized fan would have handled for a fraction of the cost.
Sources
- How to Lower Humidity in Grow Tent? Here's the Best Fix!
- How To Handle Excessive Grow Tent Heat - Hydrobuilder Learning Center
- How to Cool Down a Grow Tent During the Scorching Summer
- How to Improve Airflow in a Grow Tent (Boost Yields with the Right Set – TheOneGrow
- How to cool down your grow tent and improve climate control