Growing One Autoflower Under an LED Bar in a Closet
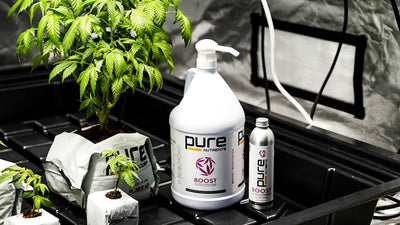
Photo by GB The Green Brand via Pexels.
One pot, one LED bar, a few square feet of closet floor. No tent, no ducting maze, no dedicated room. A single autoflower in a closet is about the lowest-friction way to grow a real plant from seed to jar, and it teaches you more per dollar than any other setup.
Autoflowers suit the space because they flower on age rather than on a light cycle. They stay compact, usually finishing in the 8 to 12 week range from germination, and you never have to flip to 12/12 or manage a stretch that could slam into the ceiling.
Set your expectations honestly. Results shift with genetics, closet size and the climate in your home. Home-growing is also governed by local rules, which differ by state and are not settled everywhere, so confirm what is legal where you live before you plant anything.
Key takeaways
- An autoflower flowers on age, so a single plant under an 18/6 schedule can finish in roughly 8 to 12 weeks from germination.
- A quality LED bar drawing about 100 to 200 watts is plenty for one plant in a closet, with intensity raised as the plant matures.
- Closet grows usually fail on heat, humidity and light leaks, not genetics, so sort out airflow and darkness before you plant.
Prepping the Closet Before You Plant
A closet around 2 by 2 feet with 4 to 5 feet of usable height will hold one autoflower comfortably. Taller is better, because extra height gives you more light-to-canopy distance and a margin when the plant stretches in early flower.
Line the walls with flat white paint or a Mylar-style reflective film. Skip crinkled kitchen foil. It scatters light unevenly and creates hot spots that scorch leaves on one side of the plant.
Next, light-proof. Turn the grow light on, shut the door, switch off the room lights and look for slivers around the door frame, vents and cable holes from the inside. Autoflowers on a dark cycle can be stressed by leaks, so seal gaps with foam tape or blackout fabric.
Plan airflow before you plant. You need a small clip fan inside the closet, plus a way to move air in and out: a gap under the door for intake and a small duct fan for exhaust works well. Stagnant air is where most closet problems start.
A few last jobs before the seed goes in:
- Put a waterproof tray or mat under the pot to protect flooring and keep a clean footprint.
- Plug everything into a surge-protected power strip.
- Keep the plug and timer off the damp floor.
- Never run an extension cord tightly coiled, since coils trap heat.
Water and electricity share a very small room here, so it pays to be fussy about this part.
Choosing and Hanging the LED Bar
For one plant, look for a full spectrum bar that draws roughly 100 to 200 watts at the wall. Ignore the equivalent wattage printed in big letters on the box. Actual draw is the number that tells you how much usable light you are buying.
Aim for roughly 300 to 500 µmol/m²/s PPFD at seedling stage and about 600 to 900 in flower. Those are general ranges. The manufacturer's hanging chart for your specific bar wins any argument.
| Stage | Approx. PPFD (µmol/m²/s) | Hanging logic |
|---|---|---|
| Seedling (weeks 1-2) | 300-500 | Higher up or dimmed |
| Veg (weeks 2-4) | 400-700 | Lower gradually as true leaves develop |
| Flower (week 4 on) | 600-900 | Closest safe distance per the maker's chart |
A quantum meter or a phone app gives only a rough guide, and phone apps are the roughest. Use them to compare spots, not to chase an exact number.
Start the light higher or dimmed for the first week or two, then lower it step by step. Watch the top leaves. Bleached tops, tacoed leaves that fold upward, or foxtailing buds mean the light is too close or too strong, so raise it.
A bar lights a narrow strip, not a circle. Centre the pot directly beneath it and rotate the pot a quarter turn every few days so every side gets its share and the plant grows evenly instead of leaning.
Pot, Medium and Germination
Use a 3 to 5 gallon fabric pot. Autoflowers dislike transplant stress, so you want their final home from day one. Fabric breathes, which helps prevent overwatering and stops roots circling the wall.
Germinate straight into that pot. Fill it with a light, airy potting mix with plenty of perlite for drainage, pre-moistened but never soaked. A lightly amended mix lets you feed gently from about week three without a rushed nutrient plan.
Plant the seed about half an inch deep with the taproot pointing down. Keep the mix evenly damp at around 70 to 78°F. Emergence usually takes roughly 2 to 7 days, and seedlings like higher humidity while the first leaves open.
Starting with well-bred seeds from a reputable source, such as the quality genetics Seedtiva offers, avoids most of the vigour problems that tend to get blamed on technique. A weak seed in a perfect closet still gives a weak plant.
Water in a ring around the plant rather than onto the stem, and let the top inch of mix dry before the next watering. A tiny seedling in a big pot drinks very little, so resist the urge to top it up daily. Overwatering is the single most common way to ruin a first closet grow.
Light Schedule, Watering and Feeding Week by Week
Run 18/6 for a good balance of yield and electricity cost, or 20/4 if you want slightly more light. Either way, lock it onto a reliable timer and leave it alone. Autoflowers have no flip, so the schedule never changes.
Here is a rough timeline, which will shift with genetics:
- Weeks 1-2: seedling stage, gentle light, plain water.
- Weeks 2-4: vegetative growth, low stress training begins.
- Weeks 4-5: pre-flower and the bloom stretch.
- Weeks 5 to roughly 8-12: flower building until harvest.
Feed lightly. Start with plain pH-adjusted water at about pH 6.0 to 6.8 for soil. When nutrients begin, use quarter to half strength and raise only if the leaves stay dark green and healthy.
Learn to read the pot. Lift it right after watering, then again each day. When it feels clearly light, water. That beats a fixed calendar because the plant's thirst follows size, heat and humidity, not the date.
Bloom feeding shifts toward phosphorus and potassium. Taper heavy feeding in the last one to two weeks, which tends to improve the finish and smoothness of the smoke.
Remember the autoflower's short clock. There is little time to recover from mistakes, so avoid big swings in watering or nutrients. Steady and slightly under beats generous and erratic.
Taming Closet Heat, Humidity and Odor
Aim for roughly 70 to 80°F with the lights on and a few degrees cooler at night. If the closet runs hot, dim the bar, and if the driver is separate, move it outside the closet so it stops heating the space.
Humidity targets shift with the plant:
- Seedlings: about 60 to 70 percent.
- Veg: about 40 to 60 percent.
- Late flower: about 40 to 50 percent, to lower bud rot risk in a tight space.
Put a cheap digital thermometer and hygrometer at canopy height. You want the plant's conditions, not the readings from the hallway.
For odor, a carbon filter on an exhaust fan works far better than any air freshener. Smell ramps up from about week 5 onward, so have the filter running before you need it.
Do a nightly check for light leaks and keep the door closed during the dark period. Leaks cause stress and, in sensitive genetics, sometimes hermaphroditism.
Read the signals the plant gives you:
- Curling leaf edges point to heat.
- Drooping with wet soil points to overwatering.
- Fuzzy mold points to stagnant air, so check your fan and exhaust.
Training, Harvest and Drying
Prefer low stress training. During weeks 2 to 3, gently bend the main stem sideways and tie it down so side branches climb toward the light. This spreads the canopy under a narrow bar. Topping can stunt autoflowers, so most closet growers skip it.
Remove only the lowest shaded growth near the end of veg, and avoid heavy defoliation. The plant has little time to regrow what you take.
Judge harvest by trichomes under a loupe. Mostly cloudy with some amber suits most growers. Pistil colour alone is unreliable, so do not rely on it.
Dry in a cool, dark space with moderate humidity for roughly one to two weeks, until small stems snap rather than bend. Then jar the buds and burp them regularly as the moisture evens out.
Be realistic about yield. One plant in a closet commonly gives a modest harvest that varies by genetics and setup, and a few ounces is a fair expectation for a first run.
Last, confirm your local home-grow rules before you begin. Plant limits and legality vary by state, and federal status has been in flux, so check current official sources rather than forum memory.
The closet single-plant grow rewards attention over equipment. A modest LED bar, a right-sized pot and a steady environment beat expensive gear used carelessly, and the plant will show you the difference within days.
Keep a short grow log with dates, pot weights after watering and temperature and humidity readings. Your second run will go better than your first, and those notes are how you compound the improvement instead of relearning it from memory.
Sources
- 2026 Spider Farmer Glow Bar 1FT Full Spectrum LED Grow Light
- 2026 Spider Farmer GlowBar 3FT Full Spectrum LED Grow Light
- 2026 Spider Farmer GlowBar 2FT Full Spectrum Dimmable LED
- Spider Farmer Full Spectrum LED Grow Lights
- 9 Best LED Grow Lights for 2026 Home Gardens — LED Grow Lights Depot
- Growing Autoflowering Plants Under LED: Optimal Cycles and Lamps