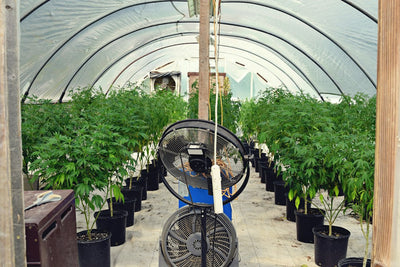
The Cannabis Plant Life Cycle: Stage by Stage
Photo by Elsa Olofsson via Pexels.
Introduction
Hold a cannabis seed in your palm, and you are holding the entire potential of a four to eight month journey, depending on whether you are running an autoflower or a photoperiod strain. Everything that follows, the cotyledons that unfurl, the first true leaves that emerge, the stretch, the swell, the harvest, all of it traces back to that single moment of germination. The process is not complicated, but it is unforgiving. A seed that is pale or soft to the touch is a seed that was pulled too early or stored poorly, and it will fail more often than it succeeds. A seedling that is overwatered in its first week can collapse from damping off before it ever gets a chance to grow. A vegetative plant that is trained too late or fed the wrong ratio will never reach the structural potential its genetics encoded. And a flowering plant that is harvested too early or dried too fast will taste like hay no matter how frosty the trichomes looked under the loupe. The growth cycle of cannabis is a sequence of distinct stages, each with its own demands, and the difference between a successful harvest and a disappointing one is not luck. It is attention to the details that change from week to week and from strain to strain. This guide walks through every stage from germination through curing, with the goal of giving growers, whether they are working in a tent or a greenhouse, a clear sense of what the plant needs at each point and why.
Germination: Days 1-10

Photo by Derrick Brown via Pexels.
Before anything green ever appears, you're making judgment calls with your eyes and fingers. Pick up the seed and look at it under decent light. What you want is dark brown to near-black, often with faint tiger-stripe mottling or a slight sheen to the shell. That coloring comes from a fully developed seed coat, which forms only after the seed has matured on the mother plant long enough. Pale tan, greenish, or white seeds look "fine" to a lot of beginners, but they're almost always immature — pulled too early or from a plant that didn't finish properly. They might swell up in water, they might even crack, but the failure rate on that group is high enough that I don't bother planting them anymore. Squeeze gently between your fingers, too: a viable seed has some hardness to it and won't crush easily. A soft or hollow-feeling seed is dead weight.
Germination itself is a fairly narrow set of environmental demands: warmth, moisture, darkness. Aim for 70-85°F at the seed level, not just ambient room temp — a seedling heat mat under a paper towel setup or propagation tray makes a bigger difference than people expect, especially if you're germinating in a cooler basement or garage. Moisture needs to be constant but not saturated; a paper towel that's wrung out until it stops dripping, then folded over the seed, is about right. Darkness matters because light exposure at this stage does nothing helpful and can dry out the seed coat faster than you want. Under those conditions, most seeds crack and push a white taproot within 3 to 7 days. Don't panic before day 10 — some seeds, particularly certain landrace or heirloom lines, are just slower and will still pop on day 8 or 9 with no issue.
One trick that reliably saves time: pre-soak seeds in a glass of room-temperature water for 12 to 24 hours before you ever touch a paper towel or medium. You'll often see them sink after a few hours, which is a decent (not perfect) sign of viability, and it softens the seed coat enough to shave a day or two off total germination time. After the soak, move straight into a moist paper towel between two plates, or directly into your starter medium if you'd rather skip a transplant step.
The moment that taproot shows, you're in the most fragile window of the entire grow. Handle the seed by the shell, never pinch the root, and plant it taproot-down about 0.5 inch deep into loose, moist medium. A root that gets bent, dried out for even a few minutes, or snapped during transfer will kill that seedling faster than any fungus gnat or spider mite ever could. Slow, careless hands do more damage here than pests do over an entire life cycle.
None of this compensates for weak starting genetics. Old seed, or seed that's been stored in heat and humidity swings, germinates unevenly even under perfect technique. Fresh, well-bred seed — the kind Seedtiva sells — simply pops more consistently and gives you a more uniform starting line to work from.
Seedling Stage: The Fragile Weeks

Photo by M_wie_Moehre via Pixabay.
Once those two rounded cotyledons pop open and unfurl flat, the countdown starts. Within three to five days you'll see the first set of true leaves emerge from the center growth point -- serrated, thin, usually just a single blade per leaf on the first pair rather than the multi-fingered fan shape people associate with cannabis. That transition, from cotyledon to true leaf, is the actual start of the seedling stage. Everything before it was germination. Everything after it, for the next two to three weeks, is a plant running almost entirely on the energy reserves packed into the seed itself and a root system that's barely a few millimeters deep.
This is the stretch where more home grows die than at any other point, and it's almost never pests. It's moisture management. A seedling's root mass is so small that it can only pull water from a thin shell of medium immediately around it. Growers used to watering mature plants carry that same watering can over to a solo cup and drown the thing in week one. Overwatering at this stage doesn't just waterlog roots -- it creates the exact stagnant, oxygen-starved conditions that fungal pathogens like Pythium and Fusarium need to take hold, which is how you end up with damping off: a seedling that looks fine one evening and is collapsed at the soil line by morning, stem pinched and translucent. There's no fixing damping off once it hits. The only real defense is prevention -- let the top half-inch to inch of medium go visibly dry and lightweight before you water again, and water in small amounts, not full saturation, until roots have actually filled out the container.
Humidity needs the same restraint. New growers often crank a humidity dome to 80-90% thinking they're helping, but that traps still, wet air right at leaf level and invites the same mold pressure from the top down. Hold ambient RH in the 65-70% range instead, and prioritize gentle air movement -- a small oscillating fan on low, well off the seedlings so it isn't thrashing them -- over a sealed, humid box. Airflow does more to prevent damping off and botrytis than any humidity number alone.
Light is the other lever people overcorrect. Seedlings don't want a full-intensity flowering setup blasting down at 800+ PPFD -- that bleaches leaves white and stunts them before they've built the machinery to use that much light. But too little light, or fixtures held too far away, causes the opposite problem: thin, pale stretching as the seedling reaches for a light source that isn't strong enough. A modest LED or T5 fluorescent running somewhere in the 150-300 PPFD range, positioned close but not intense, keeps growth compact and sturdy without stressing tissue that hasn't hardened off yet.
The seedling stage closes out once the plant has stacked up roughly its seventh set of true leaves, at which point node spacing tightens, stem thickness increases, and the root system has finally caught up enough to support faster water and nutrient uptake. That's the handoff into vegetative growth, and it's usually a decent proxy for the quality of the genetics underneath -- well-bred seeds tend to move through this window evenly, without the stretch or stall that weaker stock sometimes shows.
Vegetative Growth: Building the Frame

Photo by Jave Lr via Pexels.
Once your seedling or clone has established roots and is pushing new leaves with confidence, it enters vegetative growth -- the stage where the plant stops worrying about survival and starts building infrastructure. This is by far the longest and most elastic phase of the entire life cycle. An autoflower might blow through veg in 3 to 4 weeks before it flips to flowering on its own internal clock regardless of what you do. A photoperiod plant kept under 18/6 in a tent might spend 4 to 8 weeks in veg before you switch the light schedule to trigger bloom. And if you're running a photoperiod strain outdoors in a region with long summer days, veg can stretch out to 12, even 16 weeks, with the plant tracking the calendar and refusing to flower until the nights get long enough in late summer. There's no single right answer here -- the timeline is a decision you make based on the genetics you're running and the size of plant you actually want.
Light schedule is the main lever for photoperiod growers. Anything from 18 to 24 hours of light per day will keep vegetative growth aggressive, since these plants just want more photons and more hours to use them. Round-the-clock light sounds appealing on paper, but most experienced growers land on 18/6 as the sweet spot -- it gives the plant nearly a full day of photosynthesis while still cutting the electric bill by 25% compared to 24/0, and the six hours of darkness gives roots and enzymatic processes a rest period some growers believe improves overall vigor. Autoflowers don't care about schedule at all since they flower on age, not light cycle, so many growers just run them on 18/6 or even 20/4 for the entire life cycle without ever switching.
Nutritionally, this is a nitrogen-hungry stage. Leaf and canopy tissue is built largely from nitrogen, so a vegetative-formulated feed with an N ratio noticeably higher than what you'd use in flower is standard practice -- something like a 3-1-2 or 2-1-2 N-P-K ratio works well for most soil and coco setups. That doesn't mean phosphorus and potassium are afterthoughts; adequate P supports root development and K builds the stem and cell wall strength the plant needs to hold up the canopy you're about to create. EC targets typically run 1.2-1.8 mS/cm in coco or hydro during veg, climbing as the plant matures and its root mass expands enough to handle a stronger feed.
Veg is also your last real opportunity to physically shape the plant. Topping, LST (low-stress training), defoliation, and installing a scrog net all need to happen here, while stems are still pliable and flower sites haven't formed yet. Once flowering starts, branches lignify and get brittle, and any training you do risks snapping a branch or crushing the bud sites you spent weeks encouraging. If you're planning to scrog, get that net in place and start weaving branches through it by week 3 or 4 of veg at the latest -- trying to retrofit a screen onto a plant that's already stretching in early flower is a losing battle.
Light intensity should sit in the 400-600 µmol/m²/s PPFD range during veg -- enough to drive strong, compact growth without pushing the plant into the stress responses you'd see at flowering-level intensity. Ramping PPFD too high too early, before the root system and stem structure can support it, tends to produce stunted, hardened growth rather than the lush, expansive frame you actually want at this stage. Quality genetics matter here too -- a well-bred plant with vigorous genetics from a source like Seedtiva will respond to this training window with faster, more even canopy development than genetics that were never selected for structural resilience.
Pre-Flowering and Sexing the Plant

Photo by 652234 via Pixabay.
This is where the plant finally tells you what it is. Somewhere between 7 and 14 days after you flip an indoor photoperiod plant to a 12/12 light schedule, or after outdoor plants start feeling the natural shortening of daylight in late July and August, you'll see the first physical evidence of sex at the nodes -- the spots where branches meet the main stem. Before this point, you're guessing based on stretch, node spacing, or old wives' tales about serrated leaves. After it, you know.
Look closely at the nodes with a loupe or your phone camera zoomed in. Females show tiny white pistils -- fine, hair-like filaments poking out from what will become the calyx, the small teardrop-shaped structure that eventually swells into the base of a flower. At this stage they might just look like a wisp or two, almost translucent, easy to miss if you're not checking every few days. This is the structure you actually want more of. Every cola, every dense nug you're chasing later in flower is built from clusters of these calyxes stacking on top of each other, pistils catching light. A female-only garden, kept unpollinated, is what gives you seedless flower -- sinsemilla -- which is the standard for anyone growing for potency and quality rather than seed production.
Males show something different: small, round, ball-like pollen sacs instead of pistils, usually appearing slightly earlier than female pre-flowers and clustered tighter to the stem. They lack the hair-like growth entirely -- just smooth, grape-like clusters that will crack open and release pollen once mature. Unless you're deliberately breeding or making seeds, pull males as soon as you're confident in the ID, ideally before those sacs open. One missed male in a flowering room can pollinate an entire crop, and seeded buds lose a meaningful chunk of their smokable weight and potency to seed mass instead of resin production. Check daily once pre-flowers start showing, and isolate anything you're unsure about rather than leaving it in the tent to find out.
Autoflowers don't play this game at all. Because they're bred with ruderalis genetics that flower on an internal timer rather than a light trigger, they'll move into flowering roughly 3 to 5 weeks after sprouting no matter what light schedule you run -- 18/6, 20/4, even straight 24 hours. You'll still see the same pistil-versus-pollen-sac distinction when sexing them, just on a fixed clock instead of a light-dependent one, which is part of why they're popular with growers who want speed and simplicity over control.
Whichever type you're running, this transition window is fragile. Light leaks during dark periods, sudden feeding changes, transplant shock, or temperature swings can all push a genetically female plant into producing male flowers alongside female ones -- hermaphroditism. That's arguably worse than a straight male, since it self-pollinates your own crop from the inside. Keep the tent light-tight, keep feeding consistent, and don't transplant or heavily prune right as the switch happens. Starting with stable, well-bred genetics from a reputable seed source also stacks the odds in your favor here, since hermie tendencies are partly genetic.
Flowering: Early, Mid, and Late Weeks

Recommended light intensity (PPFD) rises steadily as cannabis plants mature, climbing from 200 µmol/m²/s at germination to a peak of 900 µmol/m²/s during flowering. This near 4.5x increase highlights the need to progressively boost lighting as plants advance through growth stages.
Flip a photoperiod plant to 12/12 and you're committing to somewhere between 8 and 11 weeks before harvest, depending on genetics -- a fast indica-leaning hybrid might finish at 56 days, while a sativa-dominant line can stretch past 70. That window isn't one continuous process. It's three distinct phases, each with its own visual markers and its own job for you as the grower, and treating them the same way is how people end up with airy buds or scorched colas.
Weeks 1 through 3 are the stretch. This is where the plant, sensing shortening light, throws everything into vertical growth before it commits to bud production -- expect a 50-100% increase in height depending on strain, sometimes more on a leggy sativa. Nodes that were tight during veg suddenly space out, and small white pistils start emerging from the nodes where flowers will form. This is your last real window for training: any topping, supercropping, or defoliation needs to happen now, because once stretch locks in, the plant stops treating cuts as an invitation to redirect growth. It's also when nitrogen demand starts tapering, so this is the natural point to begin shifting your feed ratio away from veg-heavy N toward a bloom formula higher in phosphorus and potassium.
Weeks 4 and 5 mark the shift into mid-flower, and it's obvious when it happens -- vertical growth stops almost completely, and the plant redirects that energy into swelling the calyxes that were just pistil clusters a week earlier. Bud sites that looked like sparse fuzz start packing in, resin production ramps up noticeably, and the smell in the room changes from green and vegetal to something sharper and more specific to the strain. This is peak nutrient uptake for most cultivars, so EC/PPM targets should be climbing toward the higher end of what your genetics tolerate, and this is where cal-mag deficiencies show up fastest if you're not supplementing in soft water or coco.
Late flowering is where harvest timing actually gets decided. Trichome density hits its peak, pistils that were white and upright begin darkening and curling inward, and the plant turns genuinely sticky -- trim scissors gumming up is a good sign you're close. This is when you should be checking trichomes under a loupe or jeweler's magnifier every few days rather than going by pistil color alone, since pistils can mislead you while trichome color -- clear, then milky, then amber -- tells the real story about cannabinoid conversion and the kind of high you'll end up with.
Environmentally, this whole arc is a moving target. Keep VPD around 1.0-1.2 kPa through the stretch to avoid stressing a plant that's already working hard on rapid cell elongation, then let it climb toward 1.0-1.5 kPa as buds mature and you want to discourage botrytis in dense colas. Light intensity should be rising in step -- push PPFD from your veg range up toward 600-1,000 µmol/m²/s by peak flower, adjusted for canopy density and how well your strain's genetics handle intense light without bleaching. Good genetics matter here too; well-bred seeds from a reputable source tend to hold structure and finish more predictably through this whole arc than genetics of unknown origin, though final results still hinge on your specific climate and setup.
Harvest, Drying, and Curing

Photo by CRYSTALWEED cannabis via Unsplash.
By the time you're standing in front of a plant with a loupe pressed to your eye, the growing part of the job is basically finished. What happens in the next month determines whether that plant becomes something you're proud to smoke or something you end up tossing after a few harsh, hay-scented bowls. Harvest, dry, and cure are three separate skills, and most home growers only ever master the first one.
Pistil color gets all the attention because it's visible from across the room, but it's a blunt instrument. Pistils browning and curling tells you the plant has stopped receiving pollen and is winding down, not that cannabinoid and terpene production has peaked. The real answer is under the trichomes, the mushroom-shaped resin glands coating the calyxes and sugar leaves. Grab a jeweler's loupe or a cheap 60x-100x USB microscope and look at the heads. Clear trichomes mean you're early -- THC is still converting, potency is climbing. A milky, cloudy appearance across most of the head means THC has peaked. Amber heads signal that THCA is starting to degrade toward CBN, which brings a heavier, more sedating effect. Most growers get the best all-around result harvesting at roughly 70-90% cloudy with 10-30% amber, adjusting based on whether they want a more energetic or more couch-locked result. Sativa-leaning strains often get chopped a bit earlier in that window, indica-leaning ones a bit later, but check several colas and several spots on each plant -- trichome maturity isn't perfectly uniform across the canopy.
Once you've chopped, resist the urge to hang branches somewhere convenient like a garage corner or a closet with airflow issues. Dry in total darkness, around 60°F with relative humidity between 55-62%, and keep gentle air movement circulating without blasting fans directly on the buds. This slow pace is deliberate -- it preserves terpenes that flash off in heat and protects against mold in denser colas. Expect 7-14 days depending on bud density and room conditions; you'll know it's ready when small stems snap rather than bend.
Curing is where the real transformation happens, and it's the step almost everyone rushes. Pack dried buds into sealed glass jars filled about 3/4 full, and burp them (open the lid for 10-15 minutes) several times a day for the first week as trapped moisture escapes, then taper to once daily. Give it a minimum of two weeks, ideally four or longer. This is when chlorophyll's grassy, hay-like edge fades and the smoke smooths out, while terpene profiles round into something closer to what the genetics were bred for. Skip this step and you've burned four to eight months of seed-to-harvest work -- the typical span from germination to cured jar, shorter for autoflowers, longer for photoperiod strains grown outdoors -- on a product that tastes like a lawn clipping.
Conclusion
The journey from seed to cured flower is measured in weeks, but the difference between a mediocre crop and an exceptional one is often decided in the final stage. Drying and curing are not an afterthought, they are the final step of cultivation, and rushing them undoes months of careful work. A plant that was fed perfectly, trained expertly, and harvested at peak trichome maturity can still end up tasting like a lawn clipping if it is dried too fast or jarred too early. The cure is where chlorophyll breaks down, terpenes stabilize, and the smoke becomes smooth. Give it at least two weeks, ideally four, and the payoff is measurable. For the rest of the cycle, the principles are consistent: match the feed to the stage, not the calendar; check the roots before you blame the leaves; and train the plant while the stems are still pliable, not after they have lignified. Genetics set the ceiling on what any plant can achieve, but cultivation technique determines whether it gets there. Stable, well-bred seeds make the process more predictable, especially during the fragile seedling phase and the unpredictable flowering transition, but even the best genetics need proper root zone management, environmental control, and harvest timing to express their full potential. The plant is always signaling what it needs, through leaf color, stem thickness, root mass, and trichome clarity. The job of the grower is to read those signals and respond accordingly.
Sources