Cotyledon Leaves Turning Yellow: A First-Grow Guide
Photo via Unsplash.
Two days ago your seed cracked open. Now those first two round leaves are turning yellow at the edges, and you're staring at your phone at 11pm typing "why is my seedling dying" into a search bar. Take a breath. On a first grow, this is one of the most common moments of unnecessary panic in the entire cycle, and most of the time nothing is actually wrong with your plant.
Here's the core thing this guide is going to help you sort out: telling the difference between normal cotyledon senescence, which is just the plant retiring leaves it no longer needs, and an actual seedling problem that needs intervention. Those two situations can look similar for a little while before they diverge, and knowing which one you're looking at saves you from either ignoring a real issue or torturing a perfectly healthy seedling with unnecessary fixes.
The good news is that when cotyledon yellowing does signal a real problem, the cause is almost always one of a small handful of usual suspects: too much water, pH that's out of range, feeding that's too strong too early, or a light and climate setup that's stressing a plant with barely any root mass to work with. Once you know what to check and in what order, this stage stops being scary.
Why Cotyledons Yellow: The Normal Part of the Story
Cotyledons aren't true leaves. They're the seed leaves, and they're already formed inside the seed before it ever hits soil or a paper towel. Their job is narrow and specific: they store a small reserve of energy and, once the seed splits and the taproot emerges, they unfold and start photosynthesizing almost immediately to fuel the plant through its first few days of life, before any real root or leaf structure exists to support it.
That job has a natural end point. Once the first set of true, serrated leaves opens up and starts pulling its own weight photosynthetically, the cotyledons become redundant. The plant reabsorbs whatever nutrients it can from them and lets them go -- they yellow, sometimes go a bit papery or translucent at the tips, and eventually drop off entirely. This isn't a cannabis quirk. Tomatoes, peppers, basil, pretty much every dicot seedling you've ever grown does the exact same thing. A tray of picture-perfect seedlings in a research greenhouse with ideal everything will still drop yellowed cotyledons right on schedule.
The tell that separates normal from concerning is simple: look at what's yellowing and what isn't. If it's confined to just those two original round leaves, and the true leaves above them are solid, even green with no spotting, curling, or discoloration, you're looking at cosmetic senescence. Nothing to fix, nothing to feed, nothing to adjust. Let it happen.
Timing backs this up too. Cotyledon yellowing and drop in the first one to two weeks after emergence is exactly on schedule -- for many seedlings it starts even sooner, within the first 5-8 days once true leaves are established enough to take over. What's not normal is true leaves yellowing on that same timeline. If your true leaves are losing color while the cotyledons are still hanging on, or the cotyledons yellow unusually fast alongside pale new growth, that's a different conversation, and it's the one the rest of this guide is actually about.
When It's Not Normal: Red Flags in True Leaves
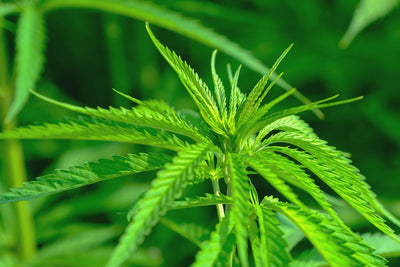
Current grow guides describe a pretty consistent picture of what a healthy seedling looks like structurally: cotyledons emerge first and unfold flat, then within a few days small, well-formed serrated true leaves appear above them. Those true leaves should be uniformly green, symmetrical, and free of spotting, curling, or any texture irregularity. That's the baseline you're comparing against.
An unhealthy seedling deviates from that baseline in ways that are usually visible before they're catastrophic. Yellow, curling, or crispy true leaves are the biggest warning signs. Droopy stems, a stretched or leggy look, or leaves that seem to be reaching rather than sitting flat all point toward stress rather than normal development. The key distinction from Section 1 stands: young leaves are supposed to be green. Full stop. A true leaf that's aging naturally doesn't happen at this stage -- there hasn't been enough time. Any color loss in a true leaf during the seedling phase is the plant signaling something, not a leaf quietly retiring.
At this stage, the realistic list of causes is short. Overwatering tops it by a wide margin, and we'll get into why in the next section. Overfeeding is a close second, especially with growers who assume seedlings need the same nutrient strength as a vegging plant. Poor root development, whether from a bad transplant, damaged taproot, or medium that's too dense for tiny roots to push through, shows up as generalized weakness. Incorrect pH quietly starves the plant of nutrients it technically has access to. And transplant shock, from moving a seedling too early or too roughly from a starter cube into its next container, can set a plant back for days.
Root rot deserves its own callout because it's the scenario growers miss most often, simply because the damage is happening somewhere they can't see. Above soil, you'll notice yellow leaves with brown, crispy edges, a stem that seems weak or stunted, and wilting that doesn't resolve even with watering. Below soil, if you pull the root ball, healthy roots should be white or cream-colored and firm. Rotted roots turn brown, go slimy, and often carry a distinct swamp or sewer smell at the root zone -- unmistakable once you've smelled it once, and reason enough to act immediately rather than wait and see.
The Number One Killer: Overwatering
If there's one statistic worth memorizing from this entire guide, it's this: overwatering, not underwatering, is the single biggest killer of seedlings. Growers coming from a general gardening background tend to assume dry equals dead and wet equals safe. With a cannabis seedling and its tiny, undeveloped root system, that assumption runs backwards.
Here's the mechanism. Soil or coco that stays saturated pushes air out of the pore spaces in the medium. Roots need oxygen just as much as they need water, and once that oxygen is displaced, the fine root hairs responsible for uptake start to suffocate and die. The frustrating part is that a drowning seedling often looks thirsty -- it wilts, droops, sometimes hard enough that new growers respond by watering more, which only compounds the problem. The medium is visibly wet, sometimes standing wet, while the plant is dying from lack of oxygen at the roots.
Damping-off, a fungal issue that kills seedlings at the soil line almost overnight, and root rot are both downstream of the same root cause: a growing medium that never gets the chance to dry out and breathe between waterings. Pathogens that cause both conditions thrive in constantly saturated, low-oxygen conditions and struggle in medium that cycles between moist and slightly dry.
The fix is straightforward, if it requires some discipline. Let the top layer of your medium dry out before watering again -- a finger test an inch down, or simply lifting the pot to feel its weight, works fine. Use containers sized appropriately for the actual root ball you're dealing with; a tiny seedling in an oversized pot means a small amount of roots surrounded by a large volume of medium that holds moisture far longer than the plant can use it. Confirm your pots or cups have real drainage, not just a few token holes that clog with medium. And don't ignore root-zone temperature -- aim for 75-79F (24-26C). Cold, wet roots are dramatically more vulnerable to rot than roots that are wet but warm, so a heat mat under seedling trays in a cooler room is a legitimate investment, not a luxury.
Dial In pH and EC Before Blaming Nutrients

Target root zone pH declines with growing medium: soil requires the highest pH (~6.4), followed by coco coir (~6.0), while rockwool needs the most acidic conditions (~5.65).
One of the fastest ways to hurt a seedling is to feed it like it's already in vegetative growth. In the first two weeks of life, a seedling's cotyledons and the light dose of nutrients already present in most starter mediums are enough to carry it. It doesn't need, and can't efficiently use, a feeding schedule built for a plant with real root mass and multiple leaf sets pulling in resources.
Before touching nutrients at all, get pH and EC dialed in, because both mimic deficiency symptoms convincingly enough to send new growers chasing the wrong fix. Target pH sits at 6.2-6.6 in soil, 5.8-6.2 in coco, and 5.5-5.8 in rockwool. These aren't arbitrary numbers -- they're the ranges where the specific nutrients a seedling needs stay chemically available rather than locking out. A seedling sitting in soil at pH 7.2 can have every nutrient it needs physically present in the medium and still show yellowing, because the roots simply can't access it at that pH.
EC needs similar restraint. Keep it at or below 0.8 (roughly 400 ppm) for the first two weeks. Push past that and you risk burning root hairs that are barely developed enough to handle any salt concentration, let alone one built for a mature plant. The visual result -- yellowing, sometimes with a slightly clawed or curled leaf edge -- looks almost identical to a nutrient deficiency, which leads growers to add more feed to a plant that's already been overfed. That's the trap: the symptom of too much looks exactly like the symptom of too little.
One practical note that trips up a lot of first-time growers: cheap pH pens drift out of calibration fast, sometimes within days. A pen reading 6.4 when the actual solution is sitting at 5.7 will send you on a wild goose chase adjusting a pH that was never the problem. Calibrate with a proper calibration solution before you trust any reading enough to act on it.
If you're seeing cotyledons and lower leaves yellowing together with no other visible stress, no droop, no curl, no crispy edges, check pH and EC before you reach for more nutrients. In seedlings, that combination points at chemistry, not hunger.
Getting Light and Climate Right for Seedlings

Photo by maks_d via Unsplash.
Seedlings are running on a fraction of the root mass and leaf area they'll have in a few weeks, which means their tolerance for environmental swings is much narrower than a vegging plant's. Current 2026 guidance for the 2-3 week seedling stage centers on 22-26C, relative humidity between 65-80%, and an 18/6 light schedule.
Light intensity is where a lot of well-meaning growers overcorrect. Older grow guides recommended a fairly conservative 100-200 PPFD for seedlings. That number has crept upward as growers and LED manufacturers have gotten better data on what young cannabis plants can actually handle, and current guidance now runs 100-300 PPFD. That's a meaningful range, and it means you generally have more room to run a slightly stronger light than older advice suggested, as long as you're watching the plant's response rather than just chasing a number.
In terms of daily light integral, the Resource Innovation Institute's benchmark puts the clone and seedling stage at 15-20 mol/m2/day. Compare that to 20-40 mol/m2/day for vegetative growth and 25-50 for flower, and the pattern is obvious: seedlings need meaningfully less total light than later stages, not more. Pushing DLI or PPFD toward flower-stage numbers on a plant with two sets of true leaves does not accelerate growth -- it stresses a plant that doesn't have the root or leaf capacity to use that much energy.
Light that's too intense, or simply too close to the canopy, shows up as bleaching or a pale, yellowing look in new growth near the top of the plant, concentrated where light exposure is most direct. This is a genuinely different mechanism from the cotyledon senescence described earlier -- it's stress-driven pigment loss in tissue that should be actively growing, not a leaf finishing its natural job. Raising the light or dimming it usually resolves it within days if caught early.
Humidity matters just as much as light, and it's easy to overlook. Below 65% RH, a seedling's shallow, barely-developed root system can't pull water fast enough to keep up with how much the leaves are losing through transpiration, and the plant shows it through wilting or crispy leaf margins even in medium that's adequately moist.
A Quick Diagnostic Checklist
When you're staring at a yellowing seedling and not sure where to start, work through this in order rather than jumping straight to whatever fix you saw mentioned most recently in a forum thread.
- Step 1: Confirm exactly which leaves are affected. Cotyledons yellowing with green, healthy true leaves above them is normal senescence -- ignore it and move on.
- Step 2: If true leaves are involved, check soil moisture before anything else. Do a squeeze test on the medium, or just lift the pot -- if it feels heavy and stays damp for days rather than drying within a reasonable window, overwatering is the leading suspect.
- Step 3: If wilting persists despite soil that's clearly wet, or has been wet for a while, pull the pot and look at the roots directly. White and firm is healthy. Brown, soft, slimy, or foul-smelling means rot, and that changes your response from watering less to addressing an active root problem.
- Step 4: Test the pH and EC of your runoff or feed water against the medium-specific targets -- 6.2-6.6 for soil, 5.8-6.2 for coco, 5.5-5.8 for rockwool, and EC at or below 0.8 for the first two weeks -- before adjusting your nutrient regimen at all.
- Step 5: Check your environment against actual measurements, not guesses. A cheap thermometer/hygrometer combo against the 22-26C and 65-80% RH targets, and light distance or intensity checked against the 100-300 PPFD range, will usually reveal the problem if the first four steps came back clean.
One more factor that's worth naming honestly: genetics set the baseline for how forgiving a seedling is during this fragile window. Seeds from a reputable source with strong, stable genetics tend to germinate more uniformly and push through minor environmental stress with fewer complications than seeds of unknown or inconsistent quality. It's not a substitute for good technique, but starting with well-bred seeds, the kind we work to provide at Seedtiva, removes one variable from a stage where you're already troubleshooting enough of them.
If you take one thing from this guide, make it this: most of the yellow-cotyledon panic that sends new growers searching forums at midnight is not a problem at all. It's a plant doing exactly what it's supposed to do, retiring a pair of leaves that already spent their stored energy getting the seedling this far. The plant isn't struggling. It's graduating.
The actual skill at this stage isn't intervention, it's restraint. Less water than feels intuitive. No feeding for the first two weeks in most cases. Patience while a couple of true leaf sets establish themselves and the root system catches up to what the top of the plant is doing. Every fix covered here, drying the medium out between waterings, holding EC low, calibrating your pH pen, keeping light intensity in the 100-300 PPFD range, is really a version of the same instruction: do less, and do it more precisely.
Treat this stage as your diagnostic baseline for the whole grow, not just an early hurdle to get past. Get pH, EC, and climate right now, while the plant is small and problems are easy to spot and cheap to fix, and you head off a large share of the issues that would otherwise show up harder to diagnose and more expensive to fix once you're deep into veg or staring down a flowering plant with an established problem. Outcomes still depend on your specific setup, climate, and genetics, but a seedling that gets a clean, unhurried start is the single best predictor of an easy grow from here on.
Sources
- Cotyledon Leaves Turning Yellow: Causes & Fixes Explained
- Seedling Leaves Turned Yellow: Fixing Yellowing Seedling Plants | Gardening Know How
- Seedling Leaves Turning Yellow? Here's Why
- Yellowing seedling leaves (not only cotyledons) - Ask Extension
- Effects of different light intensity on leaf color changes in a Chinese cabbage yellow cotyledon mutant