Small Grow Box Setups: Minimizing Watts, Maximizing Yield
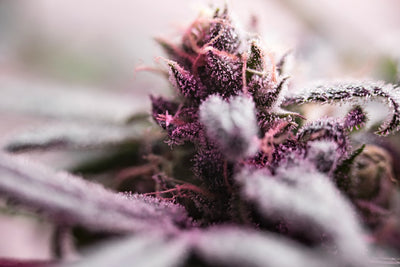
Photo by 2H Media via Unsplash.
Walk into any grow forum thread titled "is this enough light?" and you'll find the same pattern: someone with a 3x3 tent asking whether they should run 600, 800, or even 1000 watts, terrified that a smaller fixture will leave them with popcorn buds. The fear is understandable and almost always misplaced. It leads to the opposite problem nobody warns you about -- a small sealed box cooking itself at 84°F, a mini-split or extra exhaust fan bolted on to compensate, and a power bill that makes the whole hobby feel less worth it than it should.
Here's the thing that gets lost: a 3x3 or 4x4 tent is not a shrunken commercial flower room. It's a different problem entirely, with its own volume-to-canopy ratio, its own heat dissipation limits, and its own math for how many watts actually turn into grams. Grabbing a leftover 640W fixture from a buddy's 5x5 build and dropping it into a 3x3 because "more light can't hurt" ignores that in a box that small, excess wattage doesn't sit there doing nothing -- it actively works against you by dumping heat and stressing your dehumidifier.
The number printed on the box -- 300W, 480W, 600W -- tells you almost nothing about how much usable light you're getting per dollar of electricity. The real lever is photosynthetic photon efficacy, PPE, and it's the reason two fixtures pulling identical wattage from the wall can produce meaningfully different yields under the same tent. Get the sizing and efficiency right, and a small box run on a few hundred watts, run smart, will out-produce a bigger, dumber setup every single time -- while costing less to operate every month you run it.
Sizing Your Light: Watts Per Square Foot for 3x3 and 4x4 Tents

Recommended LED wattage increases with both tent size and growth stage, ranging from 225W for a 3x3 tent in veg to 560W for a 4x4 tent in flower, with flowering stages consistently requiring more light than vegetative stages for the same tent size.
Start with the simplest version of the math, because it's still the right starting point even if it's not the whole story. The 2026 rule of thumb that's held up across most home LED fixtures on the market is 20-30 watts per square foot for vegetative growth and 30-40 watts per square foot once you flip to flower. Flowering plants are pulling harder on light energy to fuel bud development, so that jump isn't arbitrary -- it reflects a real increase in photosynthetic demand as the canopy fills in and stacks vertically.
Run those numbers against actual tent sizes and you get concrete targets instead of guesswork. A 4x4 tent is 16 square feet, so flowering it properly calls for roughly 480-640 watts of quality LED. A 3x3 tent, at 9 square feet, is well served by 300-400 watts -- enough to push real intensity to the canopy without overwhelming a box that already struggles to shed heat because of its smaller air volume. That 3x3 number surprises people who assume smaller space means smaller light, full stop, but it's really about density: you're delivering similar light intensity per square foot, just across a smaller footprint.
The Department of Energy's broader estimate widens that band to 15-35 watts per square foot (161-377 W/m²), and that range exists for a reason -- crop type, canopy training, and how tightly you're managing plant height all shift where you land within it. A heavily topped, evenly trained canopy can run efficiently at the lower end because every inch of canopy is actually intercepting light. A single untrained cola reaching for the ceiling wastes light hitting empty space below it, which pushes the practical wattage need higher even in an identical tent.
Two mistakes show up constantly in small boxes, and they're opposites. Undersizing flowering light -- buying a fixture rated for veg-stage wattage and expecting it to carry you through flower -- is the single most common yield killer for first-time small-space growers. Plants stretch, bud sites stay loose, and density suffers in ways that no amount of late-flower feeding fixes. The other mistake is oversizing for a footprint that can't use the extra output: cramming a 4x4-rated fixture into a 3x3 tent doesn't buy you more yield, it just adds heat load and forces your exhaust fan and dehumidifier to work harder for nothing.
Why PPE Matters More Than the Watt Number on the Box

Photo via Pexels.
Wattage is a measure of electrical draw. It tells you what you're paying the utility company, not what your plants are receiving. PPE -- photosynthetic photon efficacy -- is the number that actually matters, and it's calculated by dividing a fixture's total photosynthetic photon flux (PPF) output by its wattage, giving you a result in micromoles per joule (µmol/J). It's the horticultural equivalent of miles per gallon: two cars can burn the same tank of gas and go very different distances.
By 2026, the baseline expectation for a decent home fixture sits at 2.5 µmol/J or better. Anything at 2.8 µmol/J or above counts as genuinely great performance for a home grow, and it's worth treating that number as a real shopping filter rather than a nice-to-have. Manufacturers have settled into rough efficiency tiers that are useful to know before you're staring at a spec sheet: 2.7-2.9 µmol/J is what's now considered the High Efficiency standard among serious growers, and 3.0 µmol/J and up is where Top-Tier or Professional-grade fixtures live.
Here's where it gets concrete. Two 320W fixtures sitting side by side on a shelf, drawing identical power, can differ by 20-30% in usable photon output depending on their diode quality, driver efficiency, and optics -- if one is built around a low PPE. That gap is not academic. It shows up directly in bud density and total yield at harvest, and it shows up every month on your electric bill as wasted watts converted to heat instead of photons your plants can use.
The practical takeaway is simple: stop shopping by wattage draw alone. Ask for the PPE spec, or find it in the manufacturer's published data, before you buy a light for a small box. A reputable manufacturer will list it plainly, often alongside light-intensity maps at various hanging heights. If a listing only advertises wattage and total lumens with no PPE figure anywhere, that's usually a sign the number isn't flattering and is being left out on purpose.
DLC Certification and Why It Should Guide Your Purchase
The DesignLights Consortium, or DLC, is a nonprofit that most home growers have never heard of but that quietly shapes which fixtures are worth buying. DLC vets horticultural lighting for efficiency, and getting listed on their Qualified Products List is what makes a fixture eligible for utility rebate programs across dozens of states and provinces. It's not a marketing badge slapped on packaging -- it's an independent efficiency check.
The current standard, DLC's Horticultural Technical Requirements V4.0, went into effect March 12, 2025, and it raised the bar meaningfully by setting a minimum PPE threshold of 2.5 µmol/J for any fixture seeking listing. The rollout had real teeth: applications for V4.0 opened April 18, 2025, existing products that were already listed under older requirements had until October 31, 2025 to requalify under the new threshold, and any fixture that didn't update got delisted as of January 5, 2026. That means fixtures currently sitting on the DLC list in 2026 have already cleared a real, recent efficiency bar -- it's not a legacy certification handed out years ago and forgotten.
For a hobbyist growing in a 3x3 or 4x4 tent, this might sound like commercial-grower bureaucracy that doesn't touch you directly. It does, in two ways. First, DLC listing is a reliable shortcut for efficiency verification -- you don't need to independently audit a manufacturer's PPE claims if the fixture has already passed DLC's testing. Second, and more directly useful, DLC listing can unlock utility rebates that cover a real chunk of the fixture's purchase price, typically in the range of 20-40% depending on your utility's program.
California's PG&E program is a good illustration of how meaningful this can be. In 2025 it paid $0.08 per kWh saved relative to a baseline HPS system, which cut the payback period on an efficient LED upgrade from 4.1 years down to 2.4 years. That's not a rounding error -- that's nearly two years shaved off the time it takes the fixture to pay for itself, just from checking a rebate program before you bought instead of after. Checking the DLC Qualified Products List before you buy takes about five minutes and can be the difference between paying full price and getting a rebate check in the mail a few weeks later.
What a Small Box Actually Costs to Run

Photo by geralt via Pixabay.
Run the numbers on an actual grow cycle and the seasonal shift in your power bill becomes obvious. A 300W LED running 18 hours a day during veg pulls noticeably more power monthly than the same fixture switched to a 12/12 flowering schedule -- you're cutting daily runtime by a third, and the bill follows almost proportionally. Flowering months typically land around $12.96-$17.28 for that light alone, depending on your local utility rate, which works out to roughly a 33% drop from what you were paying during veg. If your bill isn't dropping when you flip to flower, something else in the tent is drawing more than it should.
Lighting dominates the electricity budget in a small tent more than most people assume. Even after you count the inline exhaust fan running continuously, the carbon filter's static pressure load, and one or two oscillating fans keeping air moving across the canopy, the light fixture still accounts for roughly 75-80% of total grow tent electricity use. Fans and filters matter for plant health and odor control, but they're a small slice of the bill compared to the light hanging overhead.
That has a direct practical implication: if you're trying to cut your power bill, the light is where the real savings live. Swapping to a quieter fan or a slightly more efficient carbon filter is worth doing for airflow and smell reasons, but it will barely move your kWh total. Upgrading from a low-PPE fixture to a high-PPE one, or tightening your photoperiod, moves the needle in a way fan upgrades never will.
Photoperiod discipline deserves more attention than it usually gets. An 18-hour veg schedule run well past the point your canopy actually needs it is just burning electricity for no yield benefit -- once your plants have filled the footprint of the tent and you're ready to flip, extending veg further mostly just delays harvest and adds to the bill. The fix here isn't complicated: a mechanical timer costs less than a single month's light bill and removes the guesswork entirely.
Before you assume your setup is efficient or wasteful, actually measure it. A $15-20 plug-in kWh meter run for one full cycle, veg through flush, will tell you exactly what your tent costs to operate -- no estimating, no forum math, just your actual numbers on your actual utility rate.
Getting the Most Yield Per Watt in a Small Footprint
In a 3x3 or 4x4 tent, every square inch of canopy under the light either produces bud or it doesn't -- there's no room to write off wasted space the way you can in a bigger room. That's why canopy management matters disproportionately more in small boxes. Low-stress training, topping, and selective defoliation aren't optional extras here; they're how you make sure the light you're already paying for actually lands on productive bud sites instead of shining past a lanky main cola onto bare soil.
The goal is an even, flat canopy sitting at the distance from the light your manufacturer's guidance recommends -- not a lopsided canopy that you try to fix by cranking the dimmer higher. If one corner of your tent is stretching taller than the rest, the fix is training that corner down, not adding more wattage to compensate for uneven growth. More light poured over an uneven canopy just intensifies the imbalance and burns the tallest colas while starving the shorter ones.
Tent walls and airflow do more work than people give them credit for. Reflective mylar walls bounce photons that would otherwise be absorbed by black fabric back onto lower bud sites, and even air movement across the canopy prevents the kind of localized microclimates that create weak spots. Both improve light uniformity, and better uniformity means you can hit your target light levels across the whole canopy with less raw wattage than a tent with dark walls and dead air pockets.
Genetics matter here in a way that's easy to overlook when you're focused on fixtures and lighting specs. A compact, bushy strain bred for tight spaces will convert light into bud more efficiently in a 3x3 than a tall, lanky sativa-leaning variety that wants to stretch three feet past where your light can reach it evenly. Matching genetics to your footprint is a free efficiency gain -- it costs nothing extra to pick the right seed instead of the wrong one, and it's part of why sourcing from a seed company that breeds and selects for consistency, like Seedtiva, pays off over a season of grows rather than just one.
Last point, and it's the one growers skip most often: dial in your humidity, temperature, and general environment before you add a single extra watt. A plant fighting stagnant air and inconsistent humidity will not use extra light even if you give it to you. Fix the environment first. Extra wattage thrown at an underperforming plant is money spent on heat, not yield.
Watts per square foot gets you in the right neighborhood, nothing more. It tells you roughly how much fixture to buy, but it can't tell you whether that fixture is turning electricity into usable photons or just turning it into heat. PPE and DLC listing are what actually answer that question -- they're the difference between paying for light and paying for a space heater with an LED sticker on it.
A well-matched small box beats an oversized, cheap one every time, and not by a small margin. Right-sized wattage for your actual footprint, a fixture with genuinely good PPE, and a tight, evenly trained canopy will out-yield-per-watt a bigger, dumber setup running more total power in the same square footage. Yield per watt, not total watts, is the number worth optimizing for once you understand how the pieces fit together.
The efficiency gains compound in a way that's easy to underestimate the first time through. Pick a fixture at 3.0 µmol/J or better, run disciplined photoperiods instead of habitually leaving veg lights on longer than the canopy needs, and manage your canopy so nothing under the light is wasted space. Do that once, correctly, and the savings don't show up as a one-time win -- they show up on every electric bill of every grow you run after this one, quietly paying you back for a decision you made before you ever flipped the switch.
Sources
- How Many Grow Lights Do You Need? | Vivosun
- Grow Light Wattage Guide: Watts Per Plant, Per Sq Ft, and By Tent Size (2026)
- Compact Grow Tent Size Comparisons: 2026 Guide — LED Grow Lights Depot
- Choose the Right LED Grow Light Based on Your Grow Tent Size
- How to Choose the Right Grow Light Wattage for Indoor Plants