Transplanting Rooted Clones Into a 4x4 Grow Tent
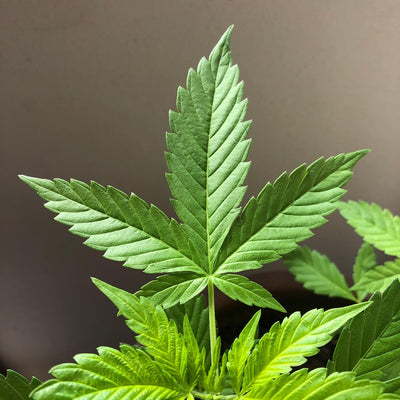
Photo by Colin redwood via Unsplash.
A tray of rooted cuttings sits on the bench, roots just showing at the base of each plug, and the 4x4 tent next to it is empty, clean and waiting. That gap is where a lot of grows quietly lose a week. Move the clones too early, soak them, blast them with full light, and they sit there sulking while your timeline slips.
Transplant shock is mostly preventable. It comes down to three things: moving the clone when the roots are ready, giving it a gentle environment for the first several days, and holding back on the watering can.
This guide walks the path from plug to established veg plant in a 4x4. Every number here is a starting point. Your fixture, medium, genetics and climate will shift them, and your local plant limit may decide how many clones you can run at all.
Key takeaways
- Transplant when white roots show at the plug edges, usually one to two weeks after cutting, before they circle or brown.
- Match plant count to your plan: 4 to 9 plants fit a 4x4, depending on training and veg time.
- Keep light gentle and humidity high for the first 3 to 5 days, then ramp to normal veg conditions.
Know When a Clone Is Actually Ready
Rooting usually takes one to two weeks, but genetics and method move that window around. Some cuts are ready in a week, and some stubborn ones take longer. Go by the roots, not the date.
Ready looks like white, firm roots reaching the sides or bottom of the plug or cube. Lift the plug gently: it should hold together instead of crumbling or feeling loose. A new leaf pair emerging at the top is the most reliable confirmation, because it tells you the roots are feeding the plant.
Too early looks like this:
- A few short nubs and nothing more
- A plug that feels loose when lifted
- A cutting that wilts when you crack the humidity dome
Overdue looks like this:
- Roots circling the plug
- Roots turning tan or brown
- Stems yellowing at the base because the clone has run out of room
Before the move, harden the clones off the dome. Vent it a little more each day over 2 to 3 days, so the leaves learn to hold water without a saturated atmosphere around them. A clone that goes straight from a sealed dome into tent air will wilt, and that wilt costs you growth.
If a few clones in the tray are ahead of the rest, move those first. Don't hold the whole tray hostage to the slowest cutting.
Plan Your 4x4 Layout Before You Pot Up
A 4x4 tent gives you 16 square feet. Layouts commonly run from 4 large, trained plants up to 9 for a tighter canopy, and 6 to 8 is a typical middle ground. Pick the number before you pot anything up.
Match the count to your veg time. A short veg favors more plants, each left mostly alone. A longer veg favors fewer plants that you top or low-stress train into wide, flat canopies. Cramming nine plants in and then vegging them for two months is how you end up fighting your own canopy.
Check your plant limit first. Home-grow rules vary by jurisdiction, and some count rooted clones toward the cap while others treat immature plants differently. I can't tell you your local answer, so verify it with your state regulator or legislature before you commit to a number.
Leave room to work. Keep pots about a hand's width from the tent walls and from each other, so air moves and you can reach every plant without dragging foliage across a neighbor. Crowded corners are where humidity pockets and mold start.
Decide the final container early. Fabric pots in the 3 to 5 gallon range are common for a 4x4. Settling this now keeps you from adding a transplant you didn't need, and every extra transplant is another small setback.
Choose the Right Pot, Medium and Moisture Strategy
You have two routes. Step the clone up to a 1 gallon pot first and move it to the final container once roots fill it, or put it straight into the final pot. Direct potting saves labor and one transplant, but it demands disciplined watering, since a small plug in a big volume of medium dries slowly.
Pre-moisten the medium before the clone ever touches it. You want it evenly damp, not soggy. A dry core repels water and starves roots, while a waterlogged bottom suffocates them, and either one stalls a young plant.
Each medium behaves differently:
- Soil: usually plain, pH-adjusted water at first, since amended soil carries its own nutrients.
- Coco: a mild nutrient solution from the start, because coco holds almost nothing on its own.
- Hydroton and other hydro setups: also a mild solution, for the same reason.
For the planting itself, dig a hole just larger than the plug. Seat the plug level with the surface or slightly below it, and firm the medium around it gently. Pressing hard compacts the medium and crushes fine new roots.
Then water around the plug, not on top of the stem. In coco, aim for slight runoff. In a large soil pot, a modest amount is plenty. After that, let the pot dry back before you water again.
Dial In Light, Temperature and Humidity for the First Week
Start with dimmed LEDs or raise the fixture. A gentle PPFD in the low hundreds of µmol/m²/s is a reasonable opening, but your manufacturer's chart for your specific fixture and hang height beats any generic number. Newly moved clones have small leaf area and fragile roots, and they can't use full intensity yet.
Run a long veg light cycle, with a consistent on and off time every day. Ramp intensity up over the first week as you see new growth, not on a fixed schedule.
Aim for warm and humid early on: roughly 75 to 80°F and moderately high relative humidity, with VPD near 0.6 to 0.8 kPa. Adjust to your own environment, because a tent in a dry basement behaves nothing like one in a humid garage.
Keep airflow indirect. You want the canopy to move slightly, not leaves flapping under a fan pointed straight at them. Aim fans above or around the plants.
Then step things up gradually over 7 to 10 days:
- Watch for perked-up leaves and fresh growth at the tips.
- Lower humidity a few points.
- Raise light intensity a notch, or drop the fixture slightly.
- Hold that setting for a day or two and check the plants before the next step.
If leaves droop or curl after a step, back off one notch and wait.
Watering and Feeding Through the Recovery Window
Overwatering is the most common mistake at this stage. A small plug in a large pot dries slowly, so water in small rings near the stem and widen the ring as roots expand into the surrounding medium.
Skip the calendar. Judge by pot weight and finger depth: lift the pot to learn what dry and wet feel like, and check an inch or so down before you water. A light pot and a dry fingertip mean it's time.
Hold off on feeding until new growth shows. Then start at a quarter to half strength. Clones carry little reserve and have a small root system, so a light touch beats a heavy one, and you can always raise strength in the next watering.
Inspect for hitchhikers. Fungus gnats and mites often ride in on cuttings. Look under leaves and across the plug surface before clones enter the main tent, and quarantine them for a few days if you can, ideally in a separate space.
Resist the urge to top or train early. Wait until the plant shows vigorous growth, usually 1 to 2 weeks after transplant. Cutting a plant that is still recovering just resets the clock.
Troubleshooting Slow or Stalled Clones
Start with persistent drooping. If it lasts beyond a few days, check for a waterlogged medium, root damage, or too much light and heat before you add anything. Adding nutrients to a stressed plant usually makes it worse.
Pale or yellowing lower leaves can come from overwatering, pH drift or underfeeding. Check runoff pH: typically 6.0 to 6.5 for soil, and 5.8 to 6.2 for coco and hydro. Correct pH first, since drift locks out nutrients even when they're present.
If a clone never roots out of the plug, gently check the root zone. It may simply have been transplanted too early, before the roots could support it. In that case, give it warmth, gentle humidity and patience, or consider whether the cutting was viable.
Uneven growth across the tent is normal. Sort plants by vigor, adjust light distance for each one, and rotate pots instead of forcing the weaker plants to keep pace. Pushing a laggard with extra feed rarely helps.
Genetics matter here too. Well-bred seeds from a quality source, such as Seedtiva, tend to give more uniform mothers and cuttings, which means fewer stragglers to manage. Results still depend on your setup and climate.
The week after transplant sets the pace for the whole grow. A clone that settles in smoothly will pass one that was rushed, even if the rushed one started with a head start. Patience at this stage buys speed later.
Begin with your plant limit and your layout, because those decide everything downstream. After that, let the plants tell you when to push light, water and feed. New leaves, firm posture and a pot that dries on schedule are the signals. Move when they say go.
Sources
- Transplanting GMO Clones in 4x4 Grow Tents
- Can I set up a small tent for clones and keep them there until the mothers complete flower and I can reset? - Grow Room - ILGM Growers Forum
- Clone tent size for 4x4 set up and cloning led light - THCFarmer
- 2x2 and 4x4 tent clones perpetual idea
- How Many Plants Can You Grow in a 4x4 Grow Tent?
- Gorilla Clone Tents & Complete Kits